Monday, June 14, 2010
Friday, June 11, 2010
Thursday, June 10, 2010
Time to make a PORTFOLIO!
requirements:
- 12 best images, designs, etc
- 3 sentence blurb about how you made, altered, created, or what the project is
- a creative blog title
- an interesting blog design and layout
http://www.blogger.com/
if you want your flash projects as a part of it, come and see me, we can make that happen...
here are some examples from digital photo
Friday, June 4, 2010
details
be sure you can tell what your object is when you are done! it should be obvious and interesting!
t-shirts!!!
We will be printing one or two of our class designs from today next week on the Seniors final day. What we need to create is a single color design that we can transfer to a screen. the process works like this:

- Step 1

Open a photo you wish to use in Adobe Photoshop. I will be using a photograph of a car that I took in Germany.
*You can use a scanned image, or an image you found on the internet. However make sure you use a higher resolution image for better results. Also check with the owner of any image you use from the internet so you don't infringe on any copyright laws. - Step 2
 Polygon Lasso Tool
Select the Polygon Lasso Tool from the Toolbox on the left-hand side.
*there are or coarse more advanced ways to create a selection, but to simplify this tutorial I will use the Polygon Lasso Tool as it is a fairly easy tool to use in Photoshop. - Step 3
 Starting Piont
In this step I will make a selection of just the car portion of my image since I do not want the background part of this photo in my screen print.
Find a starting point in the photo and click to activate the Polygon Lasso Tool. - Step 4
 Image Selection
Now piont any click around your image like you are tracing the image. Once you go completely around the image and get back to your start point. You will notice the Polygon Lasso Tool shows a small circle near where the mouse pointer is. This indicates the starting point and will close your selection when clicked. You will now notice a dashed line outlining what you have selected.
- Step 5
 Selection Inverse
Since I want to delete the background portion of the photo I will need to inverse my selection. Currently I have made a selection of the car in this photograph.
Go to the top Menu Bar under: Select>Inverse - Step 6
 Inversed Selection of Car in photo
This does exactly what it implies, it inverses the selection. Now everything except the car is selected.
- Step 7
 Deselect
Now your ready to delete the background portion of this image. Make sure your background color is white and hit the delete button on your keyboard. Your background will turn white.
To deselect go to the top Menu bar under: Selection>Deselect - Step 8
 Threshold Dialog Box
This process will prepare your image for a one color screen.
Next go the top Menu bar under: Image>Adjustments>Threshold
In the Threshold Panel use the slider to achieve the amount of threshold you would like. Make sure Preview is checked in the Threshold dialog box to see your results. Note that the black parts of the image will be the color of the screen printing paint you choose for your silk screen. Once you get it the way you want click OK. - Step 9
 Save As
Now go to you top Menu bar under: File>Save As
This will ensure you are saving your edited image as a different file so you don't save over the original. I usually save to the Desktop so I can easily find my image. - Step 10
Now your ready to print on to your transparency paper/film. Just add your transparency paper/film to your printer and print.
*Your transparency paper/film should have a gritty side and a smooth slick side. You will most likely want to print on the gritty side. Read the directions of the transparency paper/film directions for proper printing.
*Some printer do not print on the same side that you put your paper in. To check this take a peice of blank paper and write UPSIDE on the sheet with a pen. Then place the sheet in the paper tray. Then print any image onto that paper. If it prints on the same side as the side you wrote UPSIDE on, then you know it prints in the same orientation. If it prints on the opposite side, then you know the printer flips the page, and or prints on the bottom side. This will help you place the trancparency in to print on the correct side.
*Most new printers show with a small icon on the printer paper tray the correct way to insert the paper. - Step 11
My next Article on eHow explains How To Screen Print. Click the link below located in the Resources section of this page.


Wednesday, June 2, 2010
Updated contest...
"Imagine if it were attorney's or contractors: I want you 10 to build me a house and I'll pay the one that I like." That, says Jeff Barlow, president of the Seattle chapter of the American Institute of Graphic Arts, is exactly what Bumbershoot is doing with their contest to find a permanent logo for the annual festival.
Each year Bumbershoot commissions a different designer to illustrate an advertising and promotions campaign for the festival, but in celebration of their 40th festival, Bumbershoot brass decided to hold a contest to find a permanent logo for the festival, with the creator of the chosen logo going home with a gold pass to this year's festival, but no money. The response--most notably in comments on Bumbershoot's site and on Twitter--from the local graphic arts community hasn't been positive.
"Basically, I think it devalues our whole industry," says Kevin Gordon, a local freelance designer. "It allows people to get something at a really low value. And the people that are submitting stuff are probably fine with that, and they're probably not the best people in the industry that you'd want to get work from anyways."
Bumbershoot spokesperson Mikhael Williams says the festival's not trying to devalue anything. Bumbershoot, Williams says, employs an in-house design manager, and pays a different designer every year to re-imagine the festival in a visual way for their advertising and promotion campaign (as seen above).
"I cannot emphasize enough that this was specifically thought of and conceived of as one of the 40 ways to celebrate the 40th festival...and engage the creative community here in Seattle," Williams said, referencing Bumbershoot's "40 Ways to Celebrate Bumbershoot" series of events and happenings this summer. "I think if it was a strictly financial issue, we would not be contracting designers, and we would be doing it in-house."
Barlow says money is not the issue here. He says firms like his, jelvetica, do pro bono work. The primary issue at hand, he says, is that working on speculation is going to mean a lot of designers putting in a lot of effort that will ultimately be wasted.
"I don't think there's anything malicious," says Barlow, who's been in contact with Bumbershoot about the issue, and believes the two parties could come to a conclusion that satisfied the festival's idea and local designers. "I don't think they're just trying to be cheap. They just didn't realize what they had done. They didn't realize there was a huge contingency of the creative community out there that would oppose this."
Williams says Bumbershoot's not opposed to talking the issue out further, but she doesn't expect the festival to change course. Barlow says that if Bumbershoot does go through with the contest, there will be a "firestorm of negative reaction."
"Considering the contest has been up for four days and my inbox is full," he says, "they've pushed a button that I really think if they un-pushed would be better for everybody."
Monday, May 24, 2010
bumbershoot
your task is to design the new Bumbershoot logo. The above link has all the details but the nuts and bolts are to design an iconic logo that will be the face of Bumbershoot, it will be their identity, it should probably contain the name Bumbershoot along with some form of a logo of your creation. Look at bumbershoot logos past to gain ideas, think about what Bumbershoot is, get creative, enter multiple times to have a better chance!!!
Turn in your entry to the classes folder to get class credit for this, as well as the above link if you want to enter.
Friday, May 21, 2010
technical writing
a form of technical communication, is a style of formal writing used in fields as diverse as computer hardware and software, chemistry, the aerospace industry, robotics, finance, consumer electronics, and biotechnology. Technical writers explain technology and related ideas to technical and nontechnical audiences. This could mean, for example, telling a programmer how to use a software library or telling a consumer how to operate a television remote control.
We will be using technical writing to create a "how to" guide. This can be done in many ways but must meet the following requirements:
- 9+ steps
- image and explanation for each step
- details into areas of confusion or potential mistakes
- built using InDesign or blogger
blurbs should be a couple sentences.
think about tutorials you have had success with and those which have not worked as well... model your "how to" after the good ones!
a few examples:
http://homemadewithlove.wordpress.com/2009/08/26/how-to-make-moist-yummy-banana-bread-a-tutorial/
http://homesteadheritage-pottery.com/wheel.html
http://golf.about.com/od/golftips/ss/golf_setup.htm
Wednesday, May 19, 2010
POSTERS DUE TODAY
***If you are done early please complete a 2nd tutorial/poster for extra credit and a second chance at winning the class competition!
Friday, May 14, 2010
Annual Day Posters!!!
Things to Include:
- Annual Day is May 28th
- Fines must be paid to get your annual
- yearbooks go back on sale May 24th for $75
- buys yours quick, before the sell out!


Assignment specifics:
follow one of the above tutorials, using YOUR OWN images, to create a creative and unique poster at 8"x10" & 400 dpi.
Wednesday, May 12, 2010
Lip Dub POSTER!!!
Date: May 27 after 4th period
Details: 7 songs from 7 decades
Participation Options:
1. Dress up like your favorite Pop Culture character for the Scavenger Hun!
2. Participate with a club.
3. Dress up like a generic person from a specific era.
4. Wear school colors and go crazy when the camera moves into the gym at the end of the video.
See Mr. Mitchell in D5 for more information.
Images from various decades would be great.
 | |
Check out http://www.uglybogus.com/ for a bunch of rock show poster examples... specifics: Document size: 8"x10" Resolution 300dpi or more Program, use Illustrator, PhotoShop, InDesign, but no Flash. |
Thursday, May 6, 2010
banners....
Friday, April 30, 2010
Flash Banner...
Requirements:
- 100x600 px document
- 200 frames long (looped)
- 1+ movie clip
- 1+ motion guide
- 12+ layers
Wednesday, April 28, 2010
First Timeline Animation
- 100+ frames
- 5+ layers
- motion tween
- shape tween
Wednesday, April 14, 2010
Creating an animated GIF file

We do this using the "animation frames" window...

we are going to be making animated .gif files that have:
- 40+ frames
- text
- image
- tween
- layer visibility
Tuesday, April 13, 2010

Friday, April 9, 2010
iPod FUN!

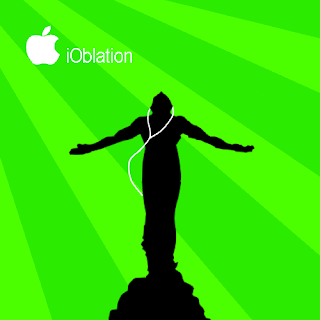

Your task is to make an ipod silhouette.
It must include:
- a creative image YOU take
- an ipod you draw/create
- headphones you draw
- a fun colored/patterned background
- a shadow
- a slogan (iHoop, iThink, IDance, etc.)
Monday, April 5, 2010
4 page spread due!
If you are done early, for extra credit you can add:


Monday, March 29, 2010


To create:
- magazine article(s)
- yearbook layout (s)
- comic book
- other - let me know your idea before moving ahead...
- each page must have 2+ images
- text on each page (captions and/or filler text)
- abstract background
- interesting layout
InDesign....
- Pen, Pencil, Brush
- WPC Image Placer
- Pathfinder
- Master
- Scissors
- Convert Path tool
Thursday, March 18, 2010
Illustrator for 3d
Follow this tutorial to make a can of beans, soda, corn, etc.
http://vector.tutsplus.com/illustration/create-a-can-of-beans-by-mapping-vectors-to-a-3d-object/

Wednesday, March 10, 2010
Adobe Illustrator...
http://www.ndesign-studio.com/tutorials/tracing-photo

Monday, March 8, 2010
Extra Credit

If you are completed with your teen mag cover, you may make a tabloid cover for extra credit using the liquify tool and or clone stamp:
Friday, March 5, 2010
Wednesday, March 3, 2010
to select around hair...
or
http://www.youtube.com/watch?v=tj-SjDE1ldg
Monday, March 1, 2010
Magazine cover tutorial...
http://www.tutorialstraining.com/cstutorials/advertisingdesign/magazine/twistrcodedtutorial.htm
Teen Magazine Cover...
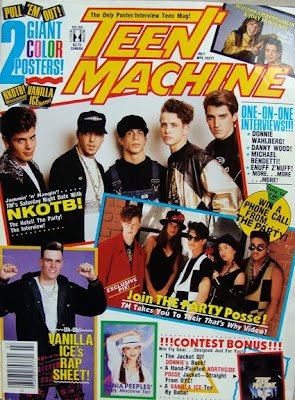
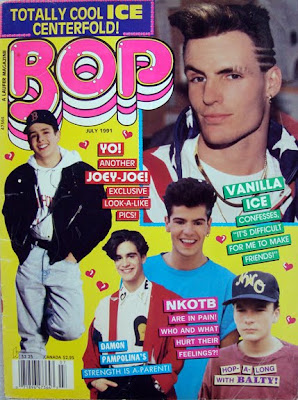
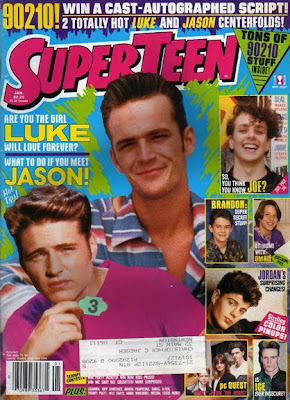
Magazine publishers, editors, and circulation directors know the importance of the cover image as both a newsstand impulse buy and as a brand. 80 percent of consumer magazines’ newsstand sales are determined by what is shown on the cover, a fact that can mean the difference between a magazine’s success or failure over time. The cover image and design reinforce the brand, an important identification factor because the average reader spends only three to five seconds scanning a magazine cover before deciding whether to buy that issue. Magazine covers not only offer information about what’s inside a particular issue, they also provide significant cultural cues about social, political, economic, and medical trends. As both historical artifacts and marketing tools, magazine covers deserve closer study.
NOTE: Teen magazines are not tabloids... they should be positive by nature, not mean, slandering, etc.
Your Job
You need to design a magazine cover using Adobe PhotoShop Elements. Your magazine cover can be based off of an existing magazine, for example use the layout and name of Teen magazine, but design your own photos, titles and story lines, or create your own magazine totally from scratch, around an interest you have. For example, create a magazine based on Rats, Shopping, a Boy/Girls Life in Middle School, or Fossils, etc.
You must have:
1. A background
2. A cover photo (may have smaller photos to show other features included in the magazine)
3. A Title, with Unique text effects
4. Several story line titles
5. Issue date
6. Issue price & bar code
7. Minimum of 4 images taken by YOU
Your magazine cover will be graded on if you included the above elements and how you carry out Unity in your magazine cover.
_____Unity can be achieved by carrying out a common theme in the type styles, photos, story titles and descriptions. Do all the parts work together?
_____Think about readability, can you read the type against the background? Is the type style readable? Are the sentences too long? Are the titles descriptive enough to make you know what the article is about? Does the type size signify the importance?
_____Does the photo or photos support the theme? Does the photo catch your eye? Is it too busy or too simple?
_____How is your effort and craftsmanship? You will need to be selecting, cutting, pasting and cropping. Does your cover look professionally neat?
_____Layout, how did you arrange all the elements? Is the type all lined up flush left, right, centered? Is the type over the picture or a background? Did you add a banner with the issue date, web site, and cost? Does the layout make it easy to read or confusing?
Friday, February 26, 2010
Slicing Tricks...
Now these can be opened in Dreamweaver.
- Inside Dreamweave you can link each page by selecting you buttons and filling in the "link" information in the properties window. Be sure to set the border size to "0" as it will otherwise default to 1px.
- Under window > Page Properties, you can set your page background color, title, etc.
- If you select all on your page you can center your site on the page.
Wednesday, February 24, 2010
Slicing!!!

Use this to draw what will become your clickable area around your buttons. Once you have sliced all your buttons, save-as once for each page of your site. You can now add information and images to each page... Here is a tutorial for this.
Monday, February 22, 2010
Web Buttons...
You need a minimum of 3 buttons on your site layout.
They Styles window may be helpful:

Additionally, you may want to look here for web layout tutorials for more ideas and advanced techniques.
Friday, February 12, 2010
turn in your logos
- save each image as a .jpeg file
- place each image into one folder
- name that folder YOUR NAME_LOGO
- place that folder in the staff server, 1st period, classes folder.
web layout example

here is a quick an overly simple example of a layout. Your goal is to make your layout fit the style, colors and mood of your logo.
Web Layout
start with a new document as below:

Wednesday, February 10, 2010
corporate logo
student example:


Shapes too...
Using either the custom shape tool or drawing/selecting your own, also create a symbol/shape/design/logo etc. that will accompany your corporate name. Look at the examples below as most have a simple design to accent their name:
Here are some tips and tutorials specific to corporate logos
Click here for a start to finish guide and example
Friday, February 5, 2010
text effects
Click here for a HUGE list of tutorials for generating neat text effects
Our task today is to follow along with 3 text effect tutorials that you think would look interesting with your graphic design company name.
example:

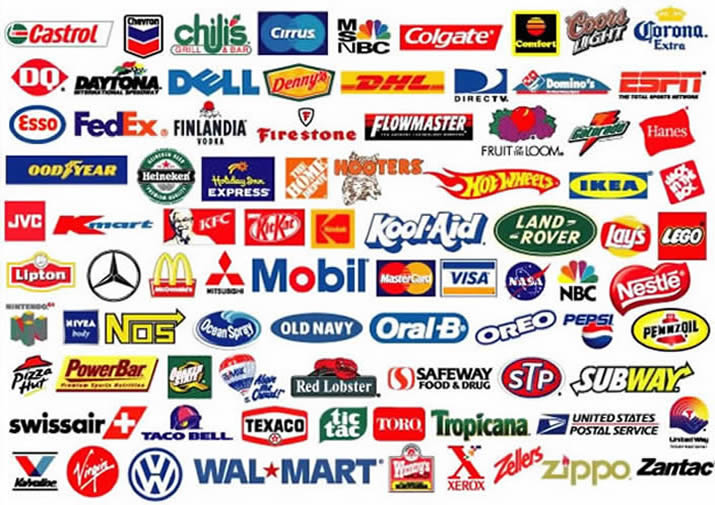
corporate identity & logos...

Here are some tips to keep in mind while designing a corporate logo :
- Use simple fonts : Some complex looking fonts might impress you at first, but keep in mind that your logo must be displayed and printed on a variety of items. e.g., Font like Times New Roman looks good when printed, but is not so readable on a computer screen. A company’s logo must go on a letterhead, business cards and other printed material as well as on display media such as Computer and TV screens. So go for a fonts which look good on both.
- Use minimum colors: A colorful logo might appear very attractive when viewed on a computer, but has serious drawbacks. Imagine you choose to order t-shirts or coffee mugs with your logo embroidered or printed. Use of minimum and easily reproducible colors will make your life much easier. If possible, try to design a monochrome logo which looks good on a variety of backgrounds.
Tuesday, February 2, 2010
welcome!
- Academic Plans due back on Monday 2-8-2010
