here is a barcode tutorial:
http://www.toxiclab.org/tutorial.asp?ID=30
Tuesday, March 29, 2011
Thursday, March 24, 2011
Mag Cover Specifics
- Document Size: 9"x12" at 400 dpi
- Text Effects: 150 tutorials here
- Use the extract tool to remove someone from their background
- textures and backgrounds
Teen Magazine!!!


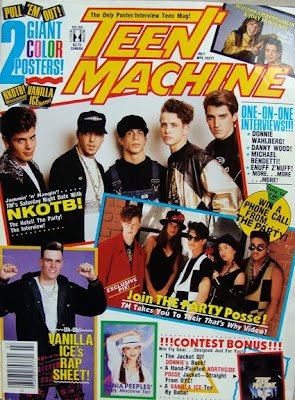
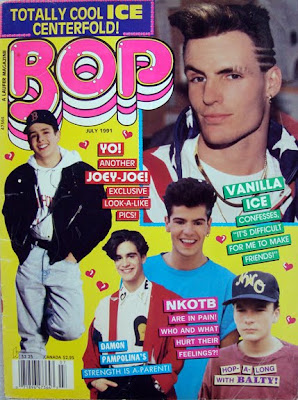
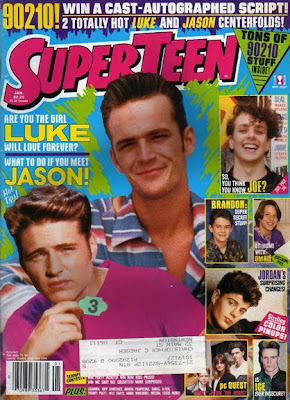
Magazine publishers, editors, and circulation directors know the importance of the cover image as both a newsstand impulse buy and as a brand. 80 percent of consumer magazines’ newsstand sales are determined by what is shown on the cover, a fact that can mean the difference between a magazine’s success or failure over time. The cover image and design reinforce the brand, an important identification factor because the average reader spends only three to five seconds scanning a magazine cover before deciding whether to buy that issue. Magazine covers not only offer information about what’s inside a particular issue, they also provide significant cultural cues about social, political, economic, and medical trends. As both historical artifacts and marketing tools, magazine covers deserve closer study.
NOTE: Teen magazines are not tabloids... they should be positive by nature, not mean, slandering, etc.
Your Job
You need to design a magazine cover using Adobe PhotoShop Elements. Your magazine cover can be based off of an existing magazine, for example use the layout and name of Teen magazine, but design your own photos, titles and story lines, or create your own magazine totally from scratch, around an interest you have. For example, create a magazine based on Rats, Shopping, a Boy/Girls Life in Middle School, or Fossils, etc.
You must have:
1. A background
2. A cover photo (may have smaller photos to show other features included in the magazine)
3. A Title, with Unique text effects
4. Several story line titles
5. Issue date
6. Issue price & bar code
7. Minimum of 4 images taken by YOU
Your magazine cover will be graded on if you included the above elements and how you carry out Unity in your magazine cover.
_____Unity can be achieved by carrying out a common theme in the type styles, photos, story titles and descriptions. Do all the parts work together?
_____Think about readability, can you read the type against the background? Is the type style readable? Are the sentences too long? Are the titles descriptive enough to make you know what the article is about? Does the type size signify the importance?
_____Does the photo or photos support the theme? Does the photo catch your eye? Is it too busy or too simple?
_____How is your effort and craftsmanship? You will need to be selecting, cutting, pasting and cropping. Does your cover look professionally neat?
_____Layout, how did you arrange all the elements? Is the type all lined up flush left, right, centered? Is the type over the picture or a background? Did you add a banner with the issue date, web site, and cost? Does the layout make it easy to read or confusing?
Flash
http://www.awdsf.com/courseware/flash/flash3_shape_tween.htm
we are making a 150 frame movie full of shape tweens!!
we are making a 150 frame movie full of shape tweens!!
Thursday, March 10, 2011
GarageBand
Today, you will start working on your first assignment in Garageband. We will start by just using the built in loops and pre-recorded material that comes installed with the software. Then, we will start adding original material using MIDI controllers. In this course, you will complete a variety of practical assignments, including: remixes, a music and film project, original compositions and audio recordings. For this loops project, you will need to fulfill the following criteria:
- at least four tracks
- 1 to 2 minutes in length
- a drum track
- some sort of bass line
- a harmony part (guitar, string, etc.)
- some sort of melody (a succession of notes forming a distinctive sequence; tune)
- be creative and think about the form: your song should have a logical beginning, middle and end
Tuesday, March 8, 2011
WEBSITE TURN IN
To Turn in your web site everything needs to be in one folder, this should be named "your name_website" and dropped into the classes folder.
MAKE SURE EVERYTHING WORKS AND LINKS BEFORE YOU TURN IT IN!
Your folder should look like this:
MAKE SURE EVERYTHING WORKS AND LINKS BEFORE YOU TURN IT IN!
Your folder should look like this:

EXTRA CREDIT
If you are done with the PS website layout assignment, for extra credit you may make a poster for the Yearbook Class.
Poster Requirements:
http://vandelaydesign.com/blog/design/photoshop-posters/
Poster Requirements:
- 8x10 inches at 400 DPI
- Poster advertising to appliy for the SC YLoch/earbook Staff
- Yearbook Applications are due April 1st
- Application are in Mr. Story's Public folder on the staff server
http://vandelaydesign.com/blog/design/photoshop-posters/
Monday, March 7, 2011
WEB SITE requirements
- PS layout with slices
- aesthetically pleasing layout
- 3 + "pages" saved for web and devices.
- links from each page to the others
- rollover images for each button

rollover images
To create a rollover image by using Dreamweaver's Insert Image Rollover dialog box, follow these steps:
1. Click to place your cursor on the page where you want the rollover to appear.
Rollover effects require at least two images: one for the initial state and one for the rollover state. You can use two different images or two similar ones, but they both should have the same dimensions. Otherwise, you get some strange scaling effects because both images must be displayed in exactly the same space on the page.
2. Choose Insert --> Image Objects --> Rollover Image.
The Insert Rollover Image dialog box appears.
3. In the Image Name box, name your image.
Before you can apply a behavior to an element, such as an image, the element must have a name so that the behavior script can reference it. You can name elements anything you like as long as you don't use spaces or special characters.
4. In the Original Image box, specify the first image you want visible. Use the Browse button to locate and select the image.
If the images are not already in your site's root folder, Dreamweaver will copy them into your site when you create the rollover.
5. In the Rollover Image box, enter the image you want to become visible when visitors move their cursors over the first image.
Again, you can use the Browse button to locate and select the image.
6. Select the Preload Rollover Image check box to load all rollover images into the browser's cache when the page first loads.
If you don't choose to do this step, your visitors may experience a delay because the second image will not be downloaded until a mouse is rolled over the original image.
7. In the When Clicked, Go to URL box, enter any Web address or browse to locate another page in your site that you want to link to.
If you don't specify a URL, Dreamweaver automatically inserts the # sign as a placeholder.
8. Click OK.
The images are automatically set up as a rollover.
9. Click the globe icon at the top of the workspace to preview your work in a browser and test how the rollover works.
Thursday, March 3, 2011
filler text
if you do not want to generate your own text you can use filler text, or lipsum text:
http://www.fillertext.com/
http://www.fillertext.com/

Tuesday, March 1, 2011
Web Site Layout

here is a quick an overly simple example of a layout. Your goal is to make your layout fit the style, colors and mood of your logo.
Taking your Corporate Identity, create a web template for that company...
start with a new document as below:
start with a new document as below:

web stuff
While creating a web layout for your corporation (logo), consider your buttons. They should fit with your logo stylistically, they should also have some text, again fitting with your logo style...
You need a minimum of 3 buttons on your site layout.
They Styles window may be helpful: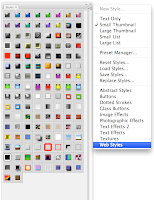
Additionally, you may want to look here for web layout tutorials for more ideas and advanced techniques.
You need a minimum of 3 buttons on your site layout.
They Styles window may be helpful:

Additionally, you may want to look here for web layout tutorials for more ideas and advanced techniques.
Subscribe to:
Posts (Atom)
